Warp Time
Warp Time is an audio editing option that was introduced in T6. Rather than needing to split out notes to move them, as discussed in the previous chapter, you can drag Warp points to bend and stretch audio into time. Apart from simply correcting timing problems, you an apply it creatively to compositions and loops to alter the feel of recorded audio.
The implementation is actually very simple. You can get up and running with Warp Time very quickly.
💡 Tip: Since T7, Warp time is also available as one of the Clip Layer Layer effects, as described in Clip Layer Effects
Warp Time Mode
Here is how to switch into the Warp Time mode:
- Select an audio clip
- In the Actions panel (or the Detail editor, Clip tab), enable the Warp Time option
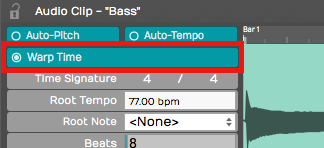
Enable Warp Time Mode
The Detail editor's waveform view switches to the zoomable Warp Time editor.
The Warp Time Editor
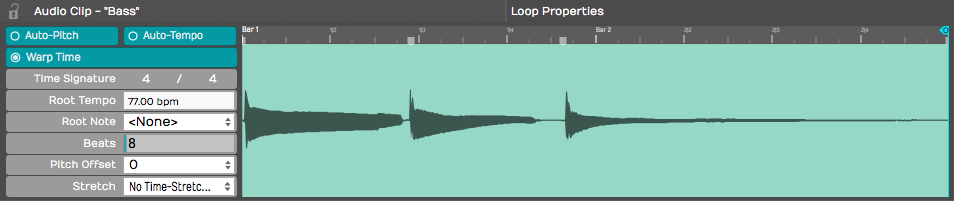
Warp Time Editor in the Detail editor
The Warp Time Editor is working on the underlying audio in the clip so there might be much more audio shown than you see on the Audio clip. This will usually be the case if you have trimmed the Audio clip before hand.
💡 Tip: If you want the Warp Time editor view to exactly match the waveform on the selected Audio clip, render the clip using Render Clip Flatten the selected clip. This will create a new underlying file. After that, what you see and hear in the Warp Time editor will match what you see and hear in the Audio clip.
Zooming In & Out - To zoom the waveform, use the mouse scroll wheel. On many laptops you can use a two finger up/down gesture in place of a scroll wheel. On Mac laptops you can also use a two finger left or right gesture to slide the waveform left and right.
Warp Points - Click on the timeline to add a Warp point. When you drag a Warp point left or right, time is stretched or compressed between that point and next surrounding Warp points.
💡 Tip: You can add a Warp point and drag in a single action. Just click on the timeline, hold and start dragging. The waveform will stretch until you stop dragging.
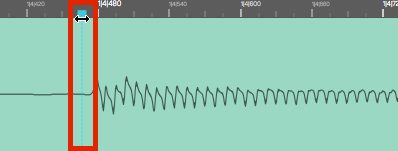
Warp Point
Removing Warp Points: Shift-click any existing Warp Point to remove it. Right-click any existing Warp point for options to rename it or remove all Warp points.
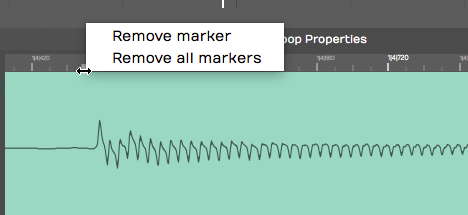
Warp Point Right Click Menu
Working with Warp Points
By default, the Warp Time editor will always have starting and ending Warp points. If you add a Warp point and move it, the audio will be stretched between the beginning and ending of the wave.

Before Warping
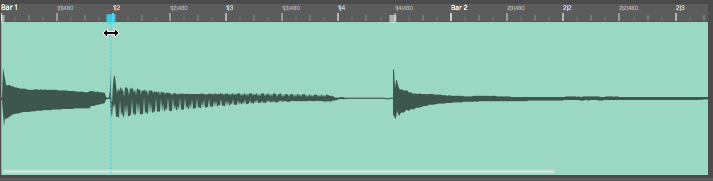
Dragging a Warp Point to the Left
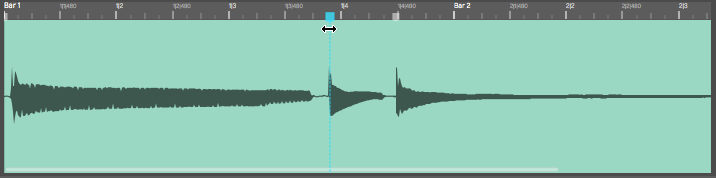
Dragging a Warp Point to the Right
To correct audio timing over a constrained area, you can think about a three point technique. You typically want to add Warp points just before the beginning of notes or percussive hits. That would be just before a transient. If you do that then stretching occurs over the note not in the middle of it.
With the three point technique, you insert Warp points before and after the note you want to alter to lock down the timing. Then add a Warp point right at the transient you want to change and drag it into to time.
Warp Points and Snapping
As you drag Warp points, you will notice they snap to the grid. The snap grid for Warp points is based on the zoom level of the Warp Time editor, not the zoom level of the Edit.
To override snapping when adjusting Warp points, hold down Cmd / Ctrl as you drag the points.
Limitations of Warp Time editing
Warp Time editing works best for single track parts. If you use it on multitrack drum parts, you will find it seriously affects the phase alignment of multi-miked drum kits. This is the same for other instruments that are recorded with multiple mics.
You can use Warp Time on stereo tracks. If you have two mono tracks, first render them to a stereo track before using Warp Time.
Time Stretch Algorithm
By default Warp Time uses Elastique Pro but you can switch it use any of the other modes as well. There is little benefit in selecting other modes, since Waveform does the actual stretching offline.
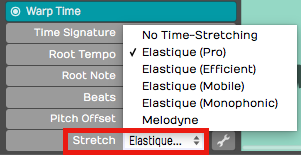
Stretch Property Options
Most of the time, Elastique Pro will give you the best results. If you have specialized needs, you can experiment with the other Elastique options under the spanner icon.

Elastique Options
📝 Note: If the Stretch property is set to "Melodyne" or "No Time-Stretching," Waveform still uses the Elastique Pro algorithm for Warp Time.
Moving On
Here is a video demo of Warp Time that you might find interesting:
Warp Time, the standard editing tools, and Melodyne give you amazing potential to manipulate the timing of your Audio clips.