Using an Amp Simulator Plugin
In this chapter, you will learn how to use an amp simulator plugin while recording direct with an electric guitar in Waveform. Out of the box, Waveform doesn't include an amp simulator plugin. However, most of the third party amp simulator plugins will work. If you don't have any of these, there is a great sounding free amp sim plugin from Voxengo called Boogex, used as an example for this chapter. You can download it from Voxengo.com.
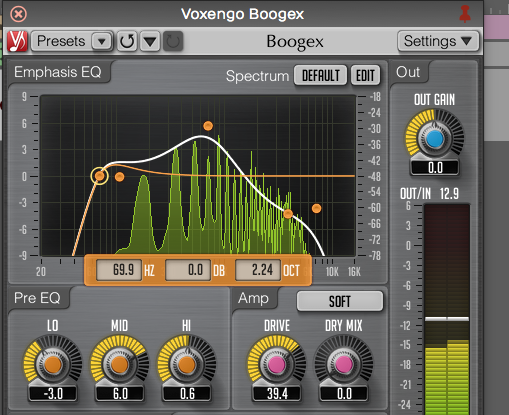
Free Boogex Amp Simulator from Voxengo
Setting Up the Track
Here is the setup:
- Connect your guitar to the high impedance input on your audio interface as described in Audio Device Setup. If your interface doesn't have a guitar input then use a suitable preamp.
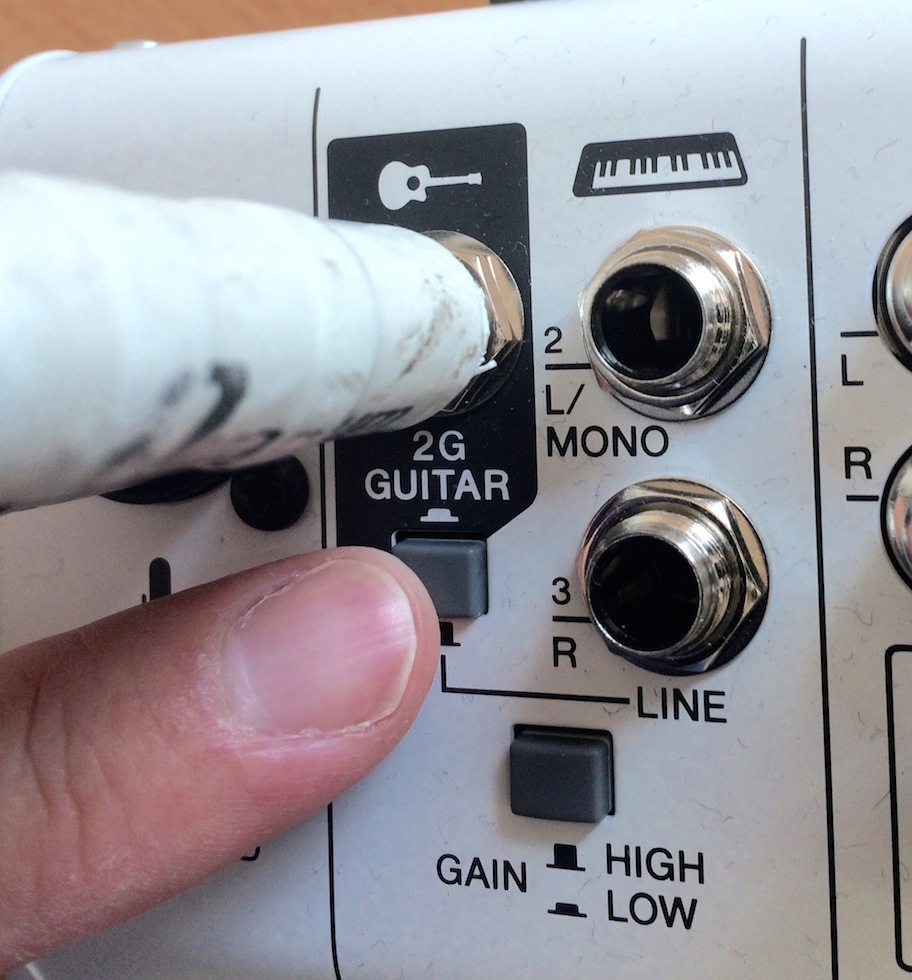
Connect Your Guitar to your Interface
- Create a new track, select the input, and arm it for recording.
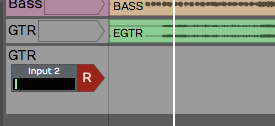
Select the Input and Arm It
- Make sure that direct monitoring of your signal though the audio interface is turned all the way down or disabled. To make this work you need to monitor 100% of your guitar signal through Waveform.
Turn off Any Input Monitoring on Your Interface
- Select the input and turn on Live Input Monitoring. At this point you should be able to hear your dry unprocessed guitar signal.
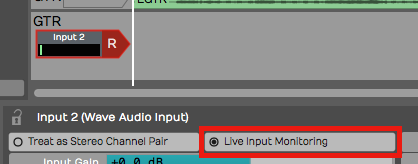
Enable Live Input Monitoring**
- Open the Browser and go to the Search tab, and type in a few characters of the name of your amp simulator plugin. Drag the plugin to the mixer section.
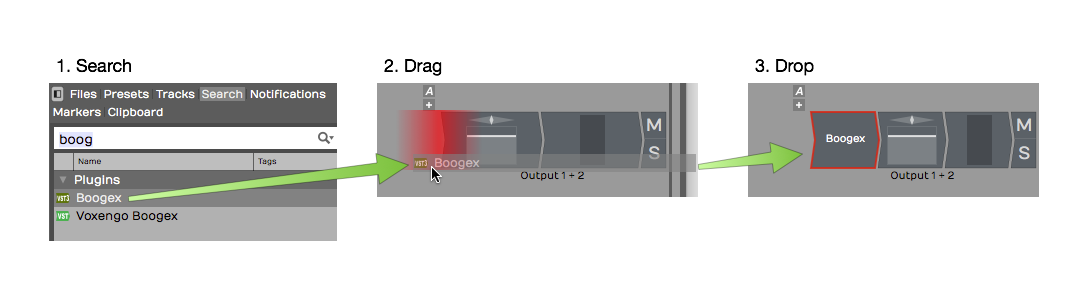
Drag the Amp Sim Plugin to the Mixer
- If the UI window for the plugin didn't open, double click it. If you have Live Input Monitoring enabled you should hear sound through the plugin when you play. Select a preset and it should sound like you are playing through a guitar amp, maybe even amps, effects, cabinets, whatever your plugin simulates.
💡 Tip: To bypass the plugin just click on the plugin to select it and press F. You can also enable or disable it using the Enabled control in properties. The shortcut F will enable or disable any selected plugins.
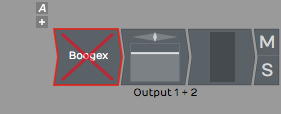
Amp Sim Plugin Shown Disabled
Recording with the Amp Sim
At this point, recording works the same as before.
- Record-enable the track, make sure the cursor is at the beginning.
- Click Record in the Transport. If you want to do loop recording then have Loop on and then you can record several takes in a quick succession.
- Once you have actually recorded the part, you can still tweak the sound.

Recording with the Amp Sim
A big advantage of recording this way is the ability to tweak the sound after the fact. You can also record using an endless variety of guitar rigs that you don't own. Plus, you can do this without disturbing the neighbors!
An important but subtle advantage is when you go to edit your guitar tracks. Edits that occur before the amp and distortion sounds more natural and are way less apparent when you edit a fully processed guitar part.
Guitar & Impedance
Guitars connect to your audio interface through a quarter-inch, unbalanced connection. This is a high impedance connection. It might not be super important to understand what that means electrically. You will get a better tone and feel if connect to a proper high impedance input. It's just the nature of guitar pickups. Going into a standard input loads them down and you lose articulation and punch. On most audio interfaces, the first one or two channels of the interface have guitar inputs. Many times there is a switch or button to enable high impedance on those channels, meaning that it will accept high impedance pickup like a guitar or bass. So while your guitar might actually work through a normal low impedance input, it is going to give you better picking dynamics and tone if you go through the high impedance input and have the high impedance mode engaged.
Managing Latency
When working with guitar amp simulators, latency can be a factor. If you have the Audio buffer size set too high, you get a big delay between when you play and when you hear a note. If you set it too low the you might get pops and clicks if the computer doesn't have adequate CPU power to handle the low latency you have chosen. The challenge is to find a good setting the feels responsive, but still has perfect sound quality.
Latency is determined by Audio Buffer Size parameter. Here is how to set that:
- Navigate to the Settings tab, Audio Devices page.
- Locate the Audio buffer size setting. The value shows a number of samples followed by a calculated latency delay.
- Enter an Audio Buffer Size value. Values around 256 or lower tend to work pretty well depending on what else is going on in the Edit.

Speed of Sound Through Air
Here is some background on the impact of the buffer size. In this example, a buffer setting of 256 samples offers 5.8 ms of latency.
What this means is that when you play a note on your guitar, you are going to hear the sound about 5.8 ms later. Now the speed sound through air is about 1 ms per foot (1ms per .3 meters). A 5 ms delay would be similar to playing your guitar amp if it were 5.8 feet (1.8 meters) away from your ears. You would need to add in the actual distance from your monitor speakers as well. If your speakers are two or three feet away, it might be like having your amplifier nine feet away. Most guitar players can deal with latency delay in that range. It's similar to the distance you would be standing from your guitar amp on stage. If it starts getting much longer than that, then you are going to hear a noticeable lag and that will affect the feel and potential impact your playing.
As another example, if you have your Audio buffer size set to 1024 samples, that gives you 23 ms of delay, That is going to give you the feeling of playing with your amplifier 23 feet (7 meters) from your ears. That is going to be really hard to work with.
Why not just set the buffer size as low as it will possibly go? That could affect the performance of the computer. If you set the buffer size too low, especially if you have a lot of other plugins and other virtual instruments going, the playback might halt or it might not sound clean.
📝 Note: It's always a balancing act between setting the buffer size as low as possible to get the latency down while keeping it high enough to have clean, solid playback. When mixing, you can increase latency to approximately 1024, mostly because that is required for Melodyne ARA.
Dialing in the Guitar Tone
You can dial in your ideal guitar tone using the controls on the amp simulator. Flip through the presets or start with a preset and tweak the controls until you get what you like. Keep in mind, one of the powerful things about recording guitar this way is you don't really have to commit to the sound at this point. Just dial in something that's inspiring so that you can get a good performance. You can always come back and tweak the amp settings later.
Using a Tuner Plugin
If you are recording direct with a guitar or bass, you might want to add a tuner plugin before the amp sim. Waveform does not include a native tuner, but if you have a tuner plug-in, you can just drop it into the effects section of the mixer for the track. That will give you a quick and easy way to tune up.
💡 Tip: If you don't have a tuner plugin, consider downloading one as part the the MFreeEffectsBundle from Melda Production.
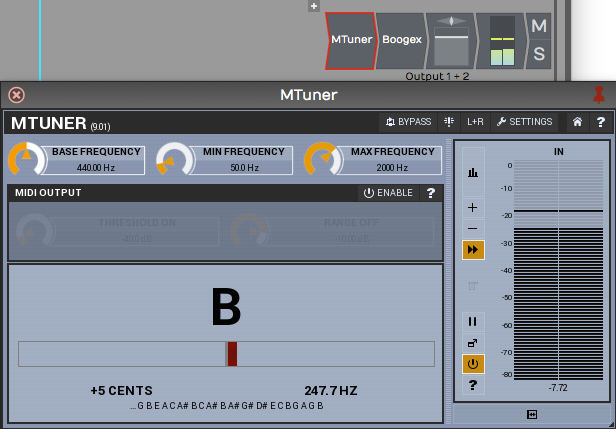
Tuning with the MTuner Plugin
Assuming you have a tuner plugin available, here is how to get it going:
- Open the Browser, go to the Search tab. Make sure Plugins is selected from the search options drop down menu. Type in a few characters of the name of your tuner plugin. The plug-in will show up in the search list.
- Drag the tuner and drop it in the plug-ins area of the track. Normally, as soon as you drop it, the user interface window will pop open. If not double click the plugin to open the UI.
- Play a note on your guitar. If the tuner does not respond make sure to arm the track for recording and enable Live Input Monitoring. This is necessary for the signal to flow through the track to the mixer section and to the tuner plugin.
💡 Tip: To keep the plugin open, click the pin icon in the upper right corner.
When you are finished with tuning, click the red X in the upper left corner of the tuner to hide its user interface.
📝 Note: In earlier versions of Waveform, Live Input Monitoring was called "End to end monitoring." It has been renamed to reduce confusion about this feature.
Moving On
You can always record in the traditional way by miking your guitar amplifier. It's also interesting to split your guitar signal and record the direct signal along with your miked guitar amp. That way you can blend the sound of the amp sim with the real amp when mixing.