MIDI Loop Recording
In this chapter you'll learn about loop recording and MIDI. Loop recording in merge mode can be useful for layering up a drum part, or building a chord over a couple of passes through the loop.
Waveform also supports MIDI loop recording to layers, which gives you the capability to build a composite MIDI performance in the same way you can do with audio.
Loop Recording in Merge Mode
In the last chapter you learned about MIDI merge mode. Here are the steps again:
- To put your track into MIDI merge mode, click on the track input, then in properties set Action to Merge newly recorded MIDI into any existing clip.
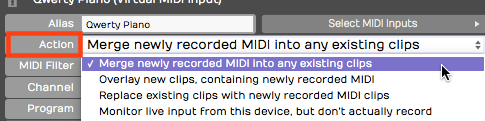
MIDI Merge Mode
- To prepare for loop recording, set the In-marker and the Out-marker over the area you want to loop.
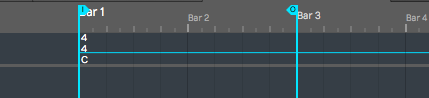
Set the In-marker & Out-marker
- Toggle the Loop button to until it's enabled.
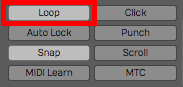
Enable Loop**
- As Waveform cycles through the loop, you'll immediately hear the results of what you played in previous passes. Keep adding passes until you're happy with the part.
- To stop recording, either click Record again or hit Spacebar.
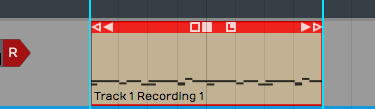
MIDI Clip After Recording
Following loop recording, you'll have a single MIDI clip containing the part you built up over successive recording passes.
This technique is particularly useful for programming drum parts, especially if drumming is not your main skill. For example, on the first pass play in the high hat. Then, on the second pass add the kick and snare. Finally, strategically add a crash on the downbeat.
Recording to Prepare for MIDI Comping
Comping is usually associated with audio recording and editing. With comping, you record multiple takes of a part then use simple editing tools to select the best phases from the various takes.
To prepare to comp with a MIDI recording, leave everything set up the same way as for merge mode, but change the Action parameter to Overlay new clips containing newly recorded MIDI.
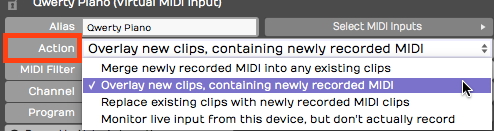
Enable Overlay Mode
Set the In-marker and Out-marker and turn Loop on. Hit Record and record a performance during each cycle through the loop.
When you hit Stop you'll have separate takes in the MIDI clip for each loop pass, just like in audio loop recording.
Comping MIDI Takes
To see the takes, click the plus icon in the lower right corner of the MIDI clip; You'll see a list of all your takes. From here, you can choose the best take from the list and that will make it active.
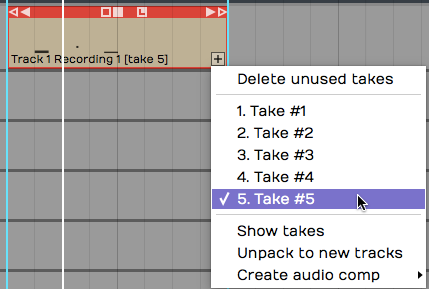
Takes Following Loop Recording
You can also expand the view to show all the takes below the track. Click the plus icon and select, Show takes.
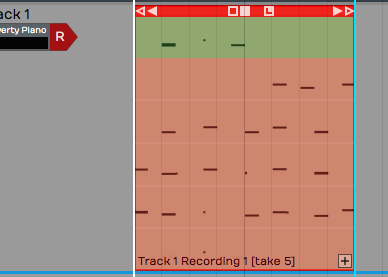
View following Show takes**
Not only does this show the takes, but it puts you in comping mode. Swipe over the phrases you want to keep and build a composite from the best parts of each take.
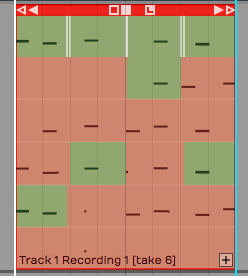
Comping the Takes
Flattening the Composite to a Single Clip
Once you have the composite assembled, you can convert it to a single MIDI clip. Click the plus icon and select Flatten current comp. You will need to press Delete on the Delete Unused Takes dialog box to proceed.
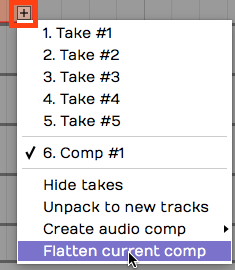
Flattening the MIDI Composite
📝 Note: When you select Flatten current comp Waveform asks if you want to delete the unused takes. If you want to flatten the takes to a single MIDI clip, you need to accept this. Note that you can use Undo following this action.
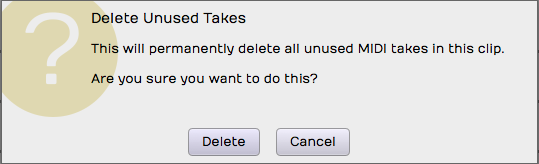
Delete Clips Warning Message
Moving On
Loop recording and comping are really powerful tools for MIDI composition, just as they are when working with audio. Next up, learn how to edit MIDI clips and MIDI notes.